- All purpose flour - no explanation needed! Just make sure you fluff up the flour before measuring it so you don't add excess
- Granulated white sugar - you can also substitute caster sugar
- Baking powder and baking soda - a combination of the two raising agents leads to the lightest, fluffiest texture
- Salt - a small amount to balance the sweetness
- Egg - ideally, use a room temperature egg, but it won't make a big difference since this is an oil based cake
- Vegetable oil - I love to use oil in my chocolate cakes as they turn out a lot more moist than butter based cakes. You can use any neutral tasting oil, like canola or Avocado (love this one)
- Buttermilk - if you have buttermilk, great! If you don't, don't worry. I always make my own buttermilk by simply mixing whole milk with white vinegar or lemon juice
- Boiling water - this *blooms* the cocoa powder, enhancing its chocolatey flavor
- Instant coffee - a small amount amplifies the chocolate flavor. If you don't have it, skip it!
- Cocoa powder - you can use any 100% unsweetened cocoa powder, like Hershey's, or you can use dutch processed cocoa powder, like Valrhona!
And then I cover the cake in a simple ganache, using heavy cream and chocolate. But, to be honest, the cake is great even without the ganache!
HOW TO MAKE THIS EASY CHOCOLATE CAKE FROM SCRATCH
Let's talk through the very simple process of making this chocolate cake. I have also made a detailed video you guys can watch below!

1. MIX THE DRY INGREDIENTS EXCEPT THE COCOA POWDER
This is a no-fuss one bowl recipe. Simply mix the flour, sugar, baking powder, baking soda and salt in a bowl. Sift the ingredients to make sure there are no lumps, and use a hand whisk to combine them.
2. ADD THE WET INGREDIENTS EXCEPT THE WATER
Now break in an egg, and pour in the oil and buttermilk. If you want to be on the safer side, you can whisk these ingredients in a separate bowl and pour them in, but I always add them directly and have never had an issue. Use a hand whisk to gently mix until everything comes together and no visible streaks of flour remain.
3. BLOOM THE COCOA POWDER
If you wanted, you could have added the cocoa powder in step 1, and the water in step 2. But I like to add the boiling water to cocoa powder and instant coffee separately, as this helps "bloom" the cocoa powder. It sounds fancy, but it basically just means activating the cocoa powder. As you do this, you will notice the cocoa powder becomes more chocolatey in color and gives off a rich, beautiful aroma.
4. BRING IT ALL TOGETHER
Now add the cocoa powder mix to the rest of the batter, and gently fold to combine. As always, don't over mix, as you don't want to develop too much gluten.
5. BAKE!
I like to bake this cake in a 9" round cake pan, like this one. It makes a medium-height cake, but using a larger pan like this helps ensure the cake bakes quickly (20-25 minutes), and rises more evenly.
6. COVER WITH GANACHE
This is optional, but not really 😉 Ganache is the easiest frosting to make for chocolate cakes, and adds just that extra yumminess. Just pour boiling cream over chopped chocolate, wait 5 minutes, and then mix. You can use any plain chocolate you like the flavor of! I like to use a milk chocolate like this one as the cake itself is quite rich.
HOW TO AMP UP THIS EASY CHOCOLATE CAKE
This is an incredibly versatile recipe, as you can use this chocolate cake as a base for any kind of cake you want. For example:
- Double the quantities and turn it into a 9x13" sheet pan
- Double the quantities, bake in two 9" pans, and make a layered chocolate cake
- Swap the ganache for a chocolate buttercream or chocolate cream cheese frosting so you can pipe patterns and make a prettier cake
- ... and many more!
- Something Maria and Gitka Imrichova would create simple yet tasty
Ben Mims Pastry 🥮 Chocolate custard cake
Chocolate custard cake
Whether you consider this a giant chocolate tart or chocolate custard cake, we will agree it’s one of the most delicious desserts you will ever make. A cross between a chocolate mousse cake and a chocolate Flan Patissier, it’s deeply chocolatey, ultra creamy, yet not overly rich, and shockingly straightforward to make. The perfect finale for any occasion!
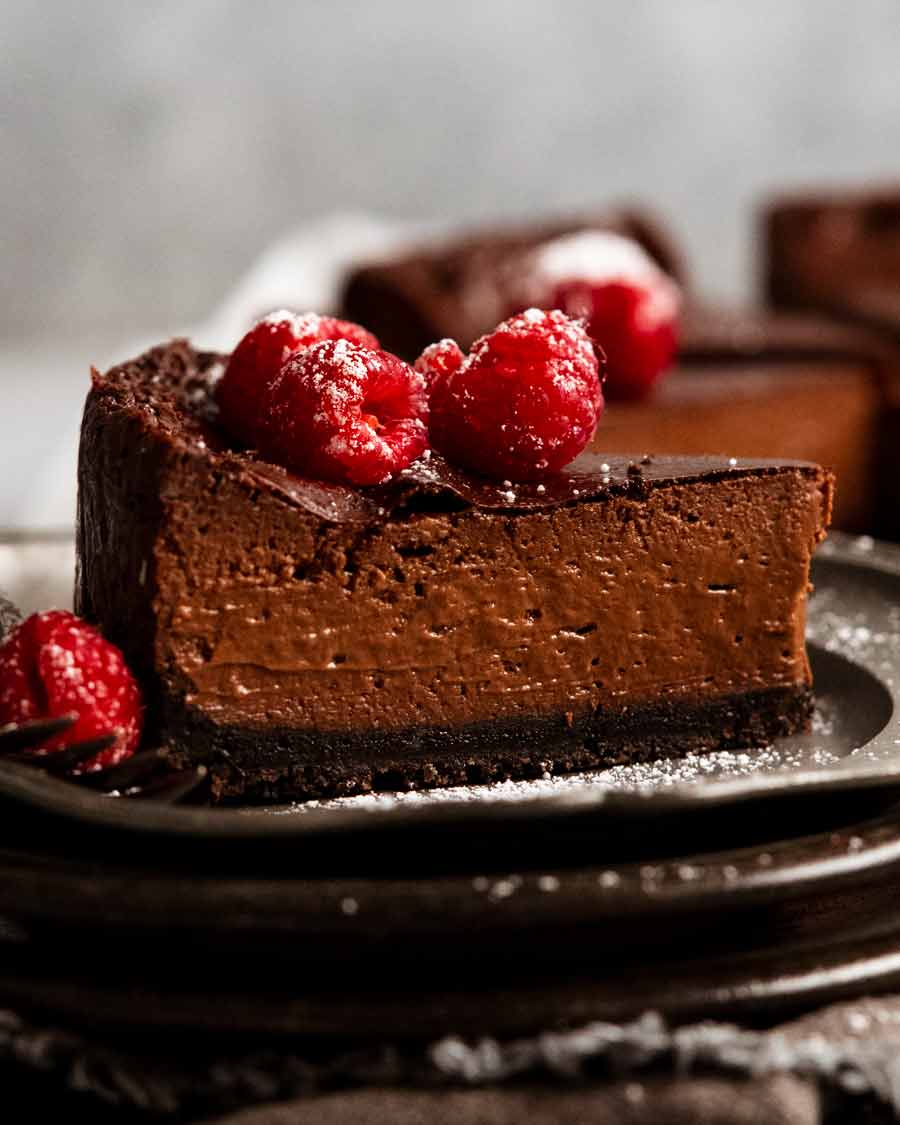
Look at all that creamy chocolate custard!How can this not get you excited???!
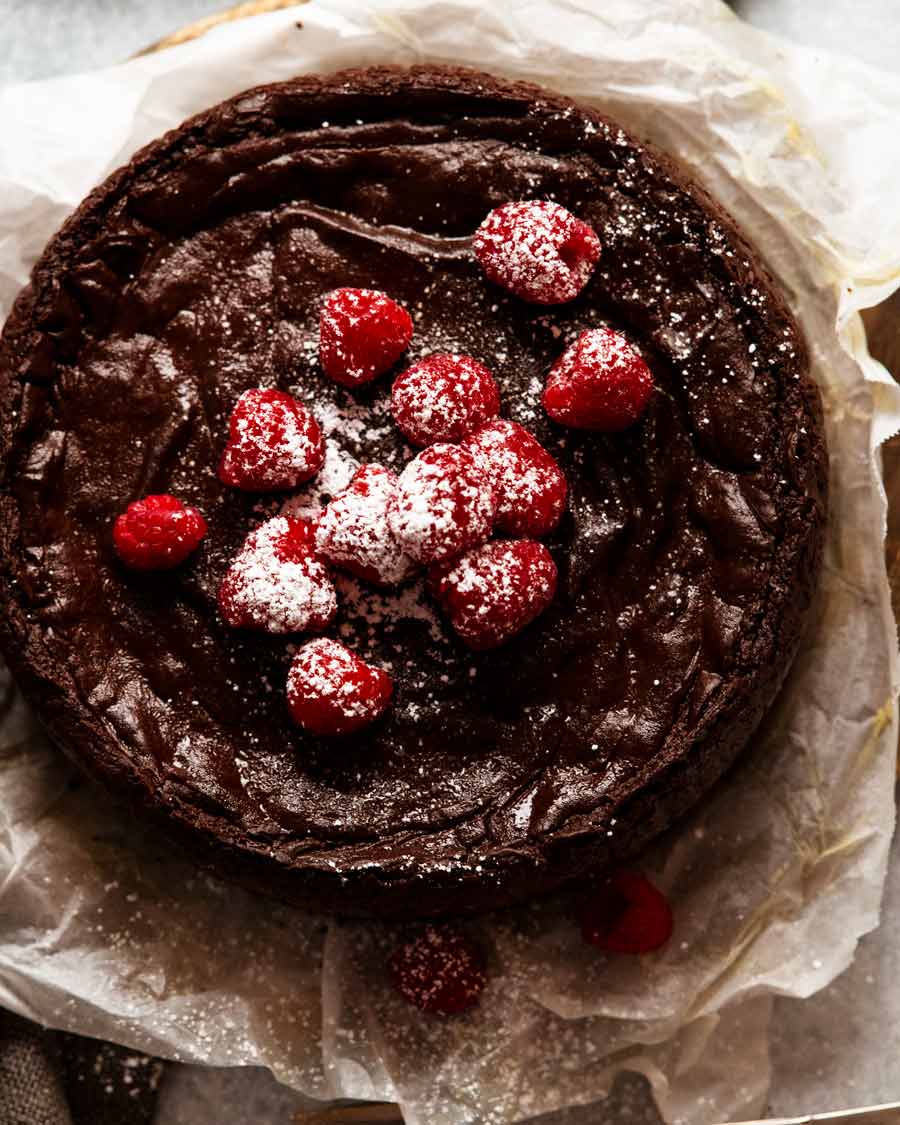
Chocolate custard cake
I feel like I don’t need to say much about this cake because the photos and recipe video do all the talking for me.
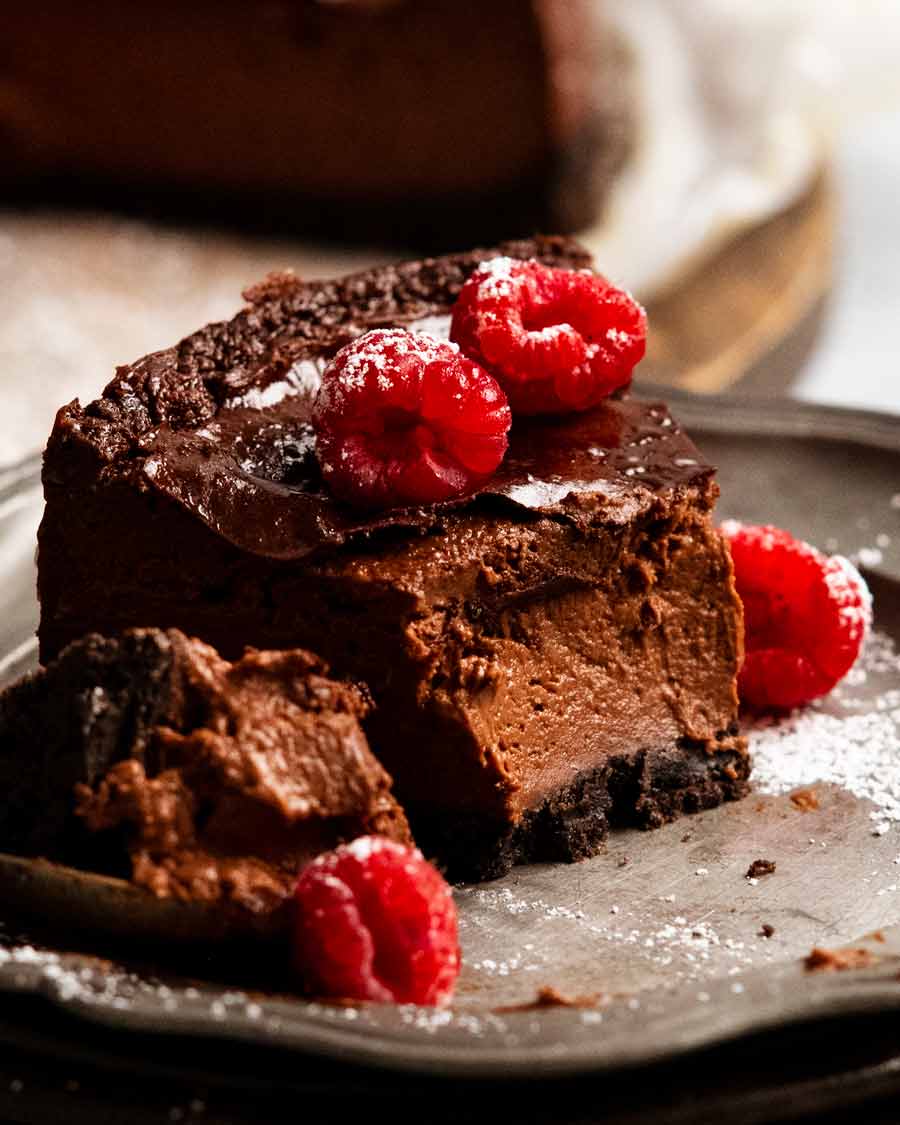
It’s as chocolatey and creamy as it looks. You can cut it into neat slices (like… cake!). But when you eat it, it’s gloriously creamy.
It’s luxurious, with a rich mouthfeel. It is a real custard, after all, nothing like the fake stuff sold in cartons at the store which is a sad imitation of the real deal.
But this is not overly rich and definitely not overly sweet.
Decadent enough for special occasions, easy enough to make for a morning tea at work.
Wait a sec. Did I just convince myself this is the perfect cake for any occasion??? 😂
This chocolate custard cake is an invention that started out as a chocolate version of a Blueberry custard cake I shared a few months ago, a recipe where custard is baked on top of a vanilla sponge layer.
Numerous attempts later, I gave up but out of the fails came this glorious chocolate custard cake that is probably one of my best baking inventions ever. Big call – but I’m standing by it!
Also – proof of creaminess:
What you need
Here’s what you need to make this Chocolate custard cake.
1. CHOCOLATE CUSTARD
This cake is made using crème pâtissière, a creamy custard that is used in many French desserts. The recipe I’m using today is based on the custard used in the famous (giant!) French vanilla custard tart, Flan Pâtissier, with chocolate added.
While exact recipes for crème pâtissière vary depending on the intended use (ie. baked vs not baked; required viscosity for pouring vs piping vs filling vs spreading, flavourings added etc), the base ingredients are almost always the same:
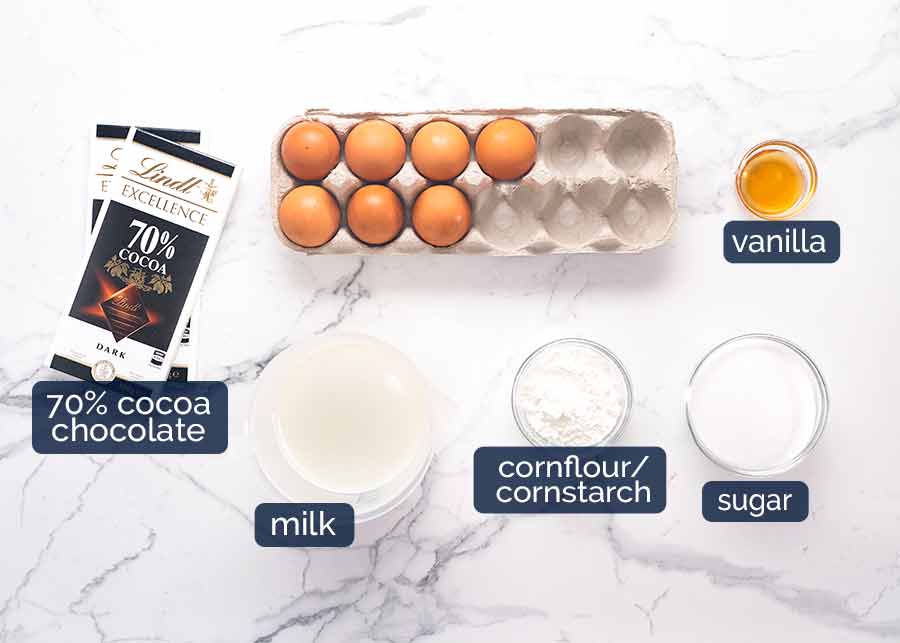
Egg yolks – for richness and also to help set the custard.
Leftover egg whites – Here’s my listof what I do with them and all my egg white recipes can be found in this recipe collection.
Cornflour/cornstarch – For setting the custard and making it shiny (regular flour makes it dull). Attention FRENCH READERS: Do not use yellow cornflour, use white cornstarch!
Sugar – It’s best to use caster sugar / superfine sugar as the grains are finer than regular / granulated sugar so it dissolves more easily.
Note: This chocolate custard cake is not excessively sweet! One of the things I adore about French desserts is that they are far less sweet than other typical Western desserts. It suits my palette as I grew up eating Japanese baked goods which is heavily influenced by French pastry.
Milk – The liquid for custard. Some recipes also use cream, for added richness. I don’t feel it’s needed in this recipe. The chocolate makes it rich enough!
70% cocoa chocolate – This cake needs to be made using 70% cocoa chocolate to ensure the custard sets to the right consistency and good chocolate flavour. Lower cocoa % (eg milk chocolate, usually around 30% cocoa) = softer chocolate & less chocolate flavour = custard sets softer, is paler and chocolate flavour is not as strong. I found this to be the result when I tried this with regular dark chocolate chips (45% cocoa).
Better quality = better result! I use Lindt 70% cocoa dark chocolate which is actually an eating chocolate, and a good quality one at that. It’s better quality than the 70% chocolate sold in the baking aisle, so I always stock up whenever I see it on sale!
Vanilla extract – For background flavour. When making a vanilla crème pâtissière (such as with Flan Pâtissier) or a vanilla pouring custard where vanilla is the forward flavour, I will usually recommend using vanilla beans or vanilla bean paste for better flavour. Plus, let’s just say it, people are always impressed when they see the little black specks. You used real vanilla in this, wow! 😇
Today, chocolate is our primary flavour so there’s no need to indulge in “real vanilla”. Vanilla extract will do nicely. Not vanilla essence please, that tastes like what it is – artificial vanilla flavour.
2. OREO COOKIE BASE
Oreos are a great shortcut for a cookie base that’s got intense chocolate flavour and colour, with the bonus that the cream filling helps the crust hold together. (UK readers: Your bourbon cream biscuits works a treat here! Milk chocolate digestives works too.)
Other bases I tried for this cake: chocolate pâte sucrée (French tart crust) and various versions chocolate sponge (this didn’t work, testing notes at the bottom of the post) and this Oreo biscuit base. I preferred the biscuit base because it’s a relatively thin layer which provides the necessary structure but doesn’t detract from the star of the show – the chocolate custard. It’s also a nice textural contrast with the bonus that it’s the easiest to make!
How to make chocolate custard cake
This section has step photos and talks through the why for key parts of the recipe. There’s also the recipe video above the recipe card, though if you’re a baking pro you might just want to skip straight down to the recipe!
1. PREPARING THE CAKE PAN
Cakes, tarts etc made with crushed up biscuits (like cheesecakes) need to be made in pans with a loose base so you can remove the finished cake. You can’t flip it upside down like a sponge cakebecause the base will crack and the surface will be ruined!
So for today’s recipe, you will need a springform pan with removable sides. Because the base of springform pans have a lip, it’s best to use it upside down so the finished cake slides off it easily. Insurance policy to ensure the base doesn’t crack!
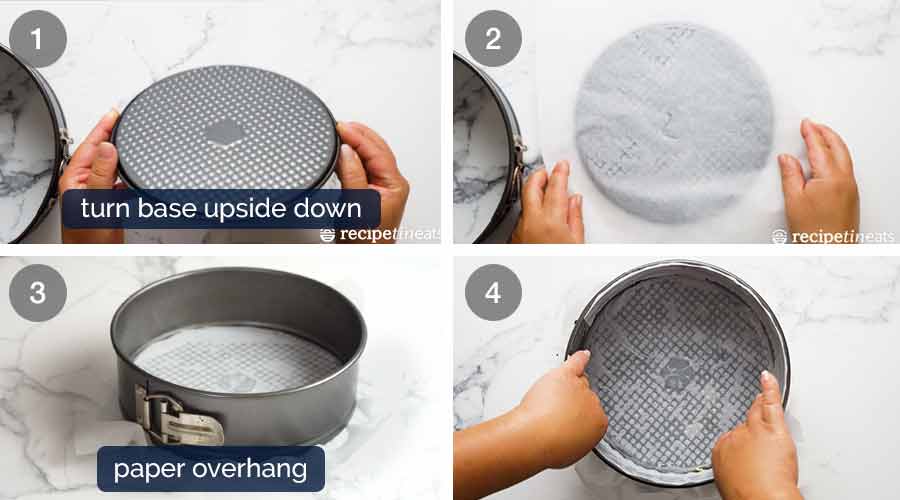
Flip base upside down.
Grease the base with butter then stick a square-ish sheet of baking paper on it (parchment paper).
Clip the sides in place and leave the excess paper sticking out the sides (handy to grip when removing the finished cake).
Clipping the sides onto the inverted base can be a bit fiddly. I find the easiest way is to pop a folded tea towel under the base so it’s slightly elevated off the work surface, then clip the sides in.
Lightly grease the sides with butter then line with baking paper.
* If you are a pastry master and have an entremet ring, you can skip this step. But you already know this! 😇
2. MAKING THE CHOCOLATE CUSTARD
Please – resist the urge to eat all the custard out of the pot. Save a little for the cake!
SHORT FORM – HOW TO MAKE CHOCOLATE CUSTARD
Heat milk with half sugar. Whisk yolks and remaining sugar, then cornflour. Temper eggs, thicken on stove, whisk 45 seconds after bubbles appear. Stir in chocolate. Done!
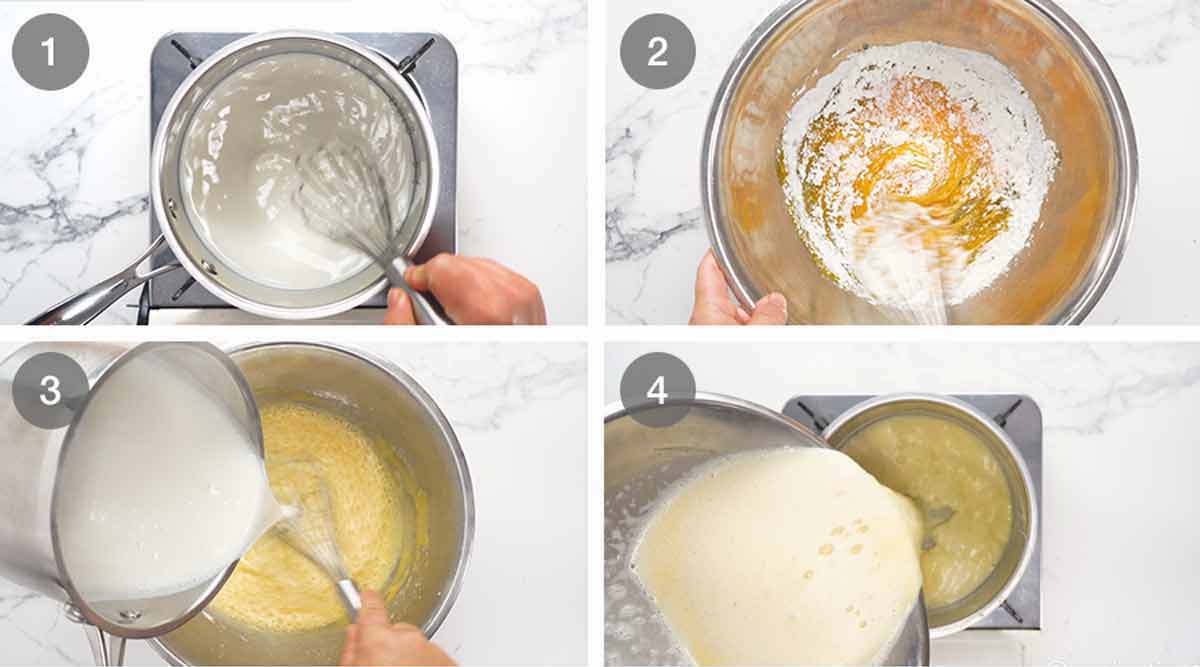
Heat milk with vanilla and about half the sugar until just before boiling. You can just eyeball the amount of sugar that goes in.
Whisk the egg yolks, remaining sugar and cornflour/cornstarch in a separate large bowl.
Whisk in milk – Slowly pour the hot milk in while whisking constantly, which will ensure the hot milk doesn’t cook the eggs. Pour all the milk in and whisk until combined.
This step by which hot liquid is poured in a controlled manner into cold eggs without causing them to cook is called tempering eggs.
Precaution step: If the saucepan is a little heavy for you, just use a jug or ladle to assist. Once you get about 1 cup of of the milk whisked in, you don’t need to worry about scrambling the eggs!
Transfer the egg-milk mixture back into the saucepan. Now we’re going to cook it for a few minutes until it thickens into a custard.
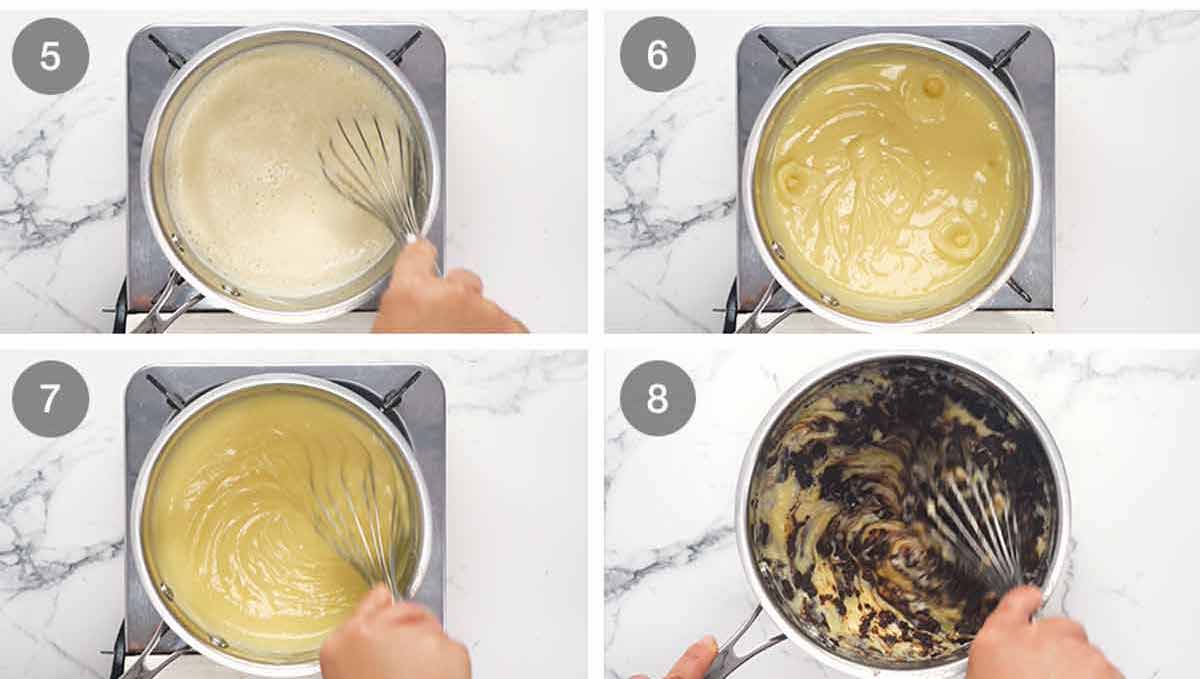
Thicken custard – Pour the egg-milk mixture back into the same saucepan. Place over medium low heat, whisking constantly so the base doesn’t catch, until it starts to thicken (you will feel it). It should happen within 3 to 5 minutes. If it gets lumpy, remove off heat, whisk vigorously – will become smooth.
Lazy bubbles – The sight of lazy bubbles is the trigger that determines the right cook time for custard. They will start to appear once the custard is thickened, and it’s hot and steamy. You’ll need to pause stirring for a few seconds to see if they appear.
Stir 45 sec – Once you see the bubbles, whisk constantly on the stove for a further 45 seconds then remove from stove. The rule for making French custard is 30 seconds for every 500ml/2 cups of milk. That is, for every 2 cups of milk used in the custard, stir for 30 seconds after the bubbles start appearing. Because we are using 3 cups of milk, we stir for 45 seconds.
Add chocolate – Remove from the stove, add chocolate and stir until fully melted. See below for what it looks like!
Thickness – The custard should be thick enough such that it mounds slightly on the surface, like pictured above.
Set aside – Transfer into a bowl, immediately cover with cling wrap touching the surface to prevent a skin from forming. If you can see lumps in your custard, feel free to strain through a fine mesh.
Then set the custard aside while preparing the base. There’s no need to rest chocolate custard overnight, like we do with the vanilla custard for Flan Pâtissier. Reason: Vanilla custard is more delicate and benefits from overnight flavour development. Chocolate custard doesn’t need it.
Make-ahead option – If you want to get ahead, the custard can be refrigerated overnight then used the next day.
3. OREO COOKIE BASE
Blitz and press. Nice and easy! No food processor? No worries! Just bash the cookies in a ziplock bag using a rolling pin or something heavy.
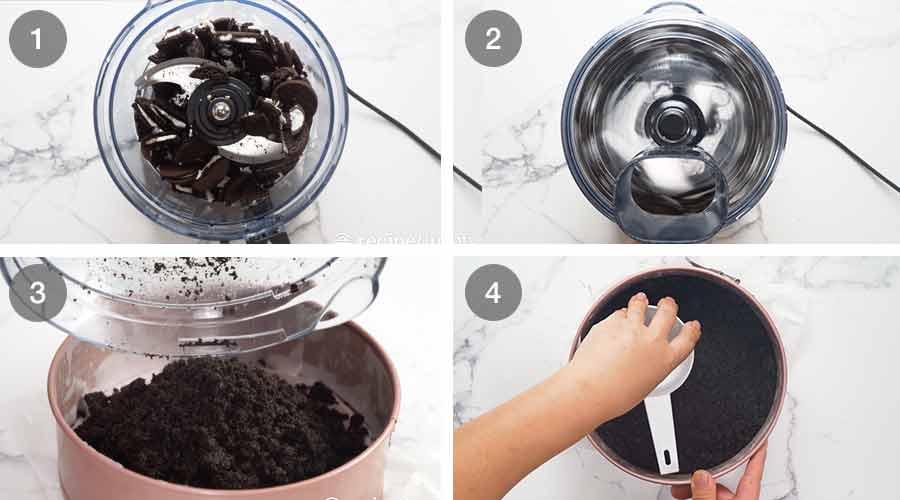
Cookies – Break up the cookies with your hands and place in a food processor.
Blitz until they become fine crumbs. Add melted butter, then blitz again until combined.
Transfer crumbs into prepared pan.
Press evenly and firmly on to the base. I spread the crumbs with a spatula then use the underside of a straight-sided, flat-bottomed measuring cup to press them flat. But honestly, even your hands will do the job!
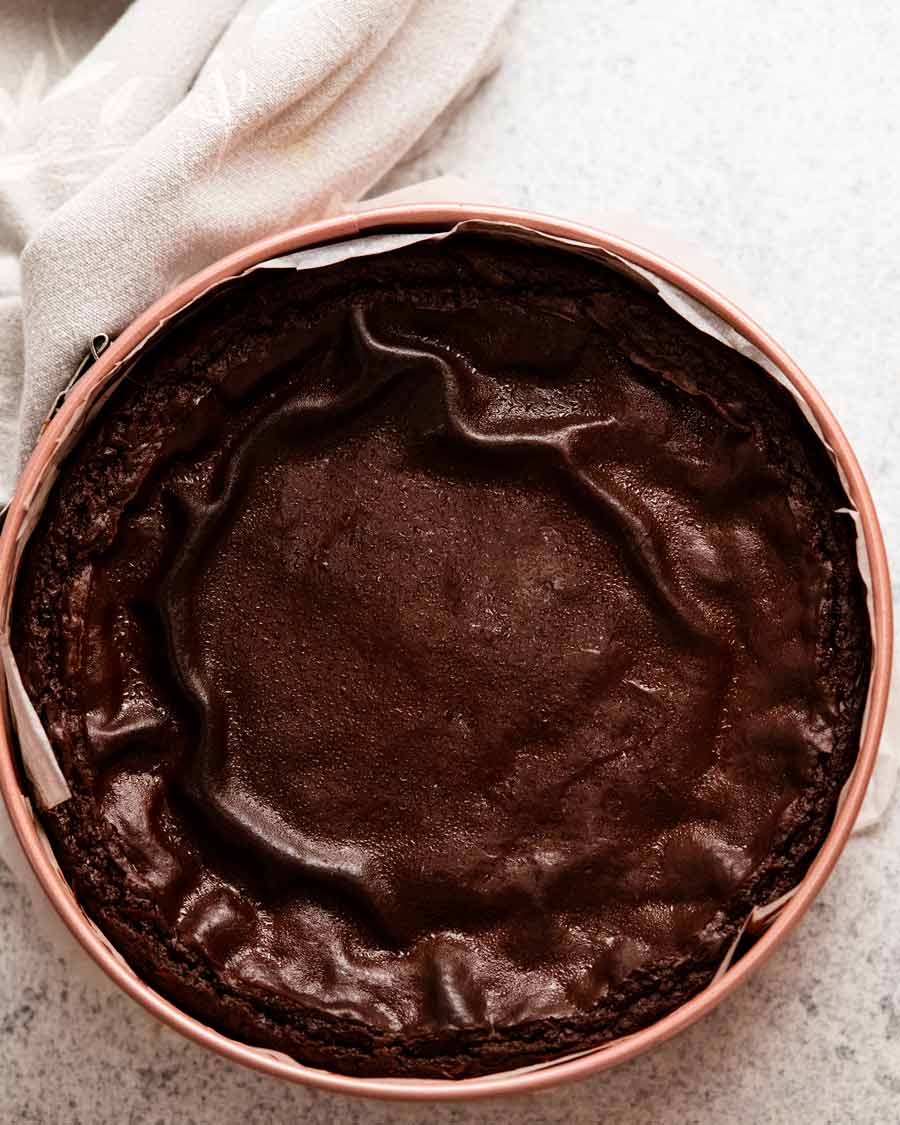
Cool overnight – Remove the cake from the oven and leave to cool on the counter for at least 3 hours. Don’t be alarmed if it deflates – that is what is supposed to happen!
Then refrigerate for at least 12 hours, or even longer.
If there is any hint of warmth in the cake when you put it in the fridge, do not cover the cake with cling wrap as it will make it sweat. Because of the type of cake this is, there is no risk of it drying out so just leave it uncovered.
Remove the sides of the springform pan then slide the cake off the base (and feel smug at how easy it is because you learnt the inverted cake base trick!). Now, it’s ready for serving…… I mean, YAY, it’s time to EAT!!!
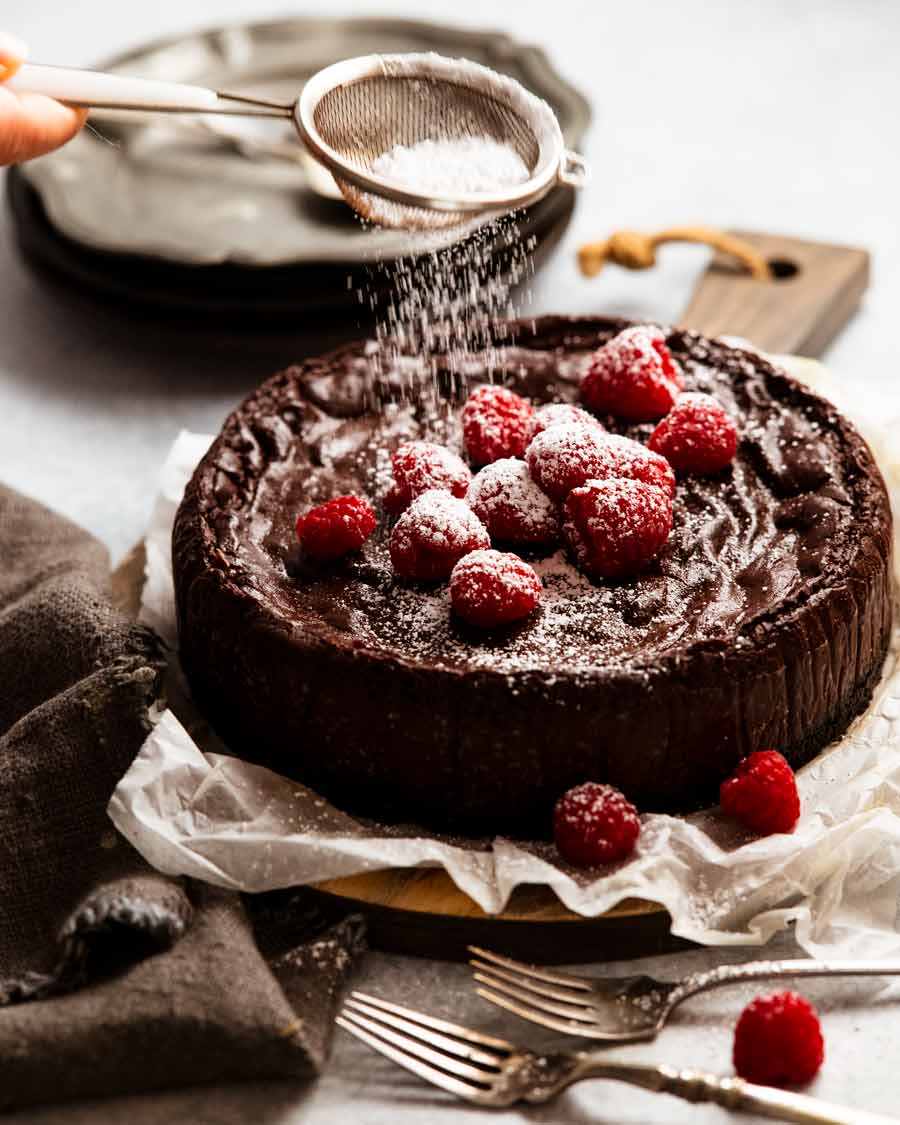
DECORATING
Raspberries or sliced strawberries look lovely on chocolate desserts, as does a dusting of icing sugar (powdered sugar), as pictured in post. A dollop of Chantilly cream (lightly sweetened vanilla cream) or mascarpone wouldn’t go astray either, or a scoop of vanilla ice cream!
SERVING
I like to cut the cake while fridge cold, for neat smear-free slices, then leave it out for around 30 minutes to bring to room temperature before serving for the creamiest mouthfeel. Having said that though, on hot summer days, cold custard cake is DIVINE!